Automatic Water Pump Controller Installation
Embarking on the automatic water pump controller installation promises efficiency and convenience. By heeding safety precautions, meticulous wiring, and adherence to guidelines, this installation ensures a reliable and automated water supply. The journey begins with precision, concluding in a seamlessly functioning system that enhances overall convenience and peace of mind.
Understanding the Importance of Proper Installation
The proper installation of an automatic water pump controller is crucial for seamless operation and long-term reliability. Precision in wiring, adherence to safety measures, and compliance with manufacturer guidelines ensure optimal performance. A well-installed controller not only automates water supply but also minimizes the risk of malfunctions, enhancing efficiency and longevity. In recognizing the significance of proper installation, one establishes a foundation for a reliable and hassle-free water pump system.
Preparing for Installation: Tools and Materials Needed
Installing an automatic water pump controller typically involves electrical work and may require plumbing components as well. Here’s a list of tools and materials you might need for the installation of an automatic water pump controller:
Tools
- Screwdrivers:
- Phillips and flat-head screwdrivers for securing electrical connections
- Pliers:
- Needle-nose pliers for gripping and bending wires
- Wire Stripper:
- To strip insulation from the ends of electrical wires
- Voltage Tester or Multimeter:
- To check for the presence of electrical voltage
- Drill:
- For making holes for mounting the controller or running wires
- Saw:
- If modifications are needed for mounting or creating openings
- Adjustable Wrench:
- For tightening nuts on electrical connections
- Crimping Tool:
- If your wiring involves crimp connectors
- Tape Measure:
- For measuring and marking locations
- Pipe Wrench (if applicable):
- If your water pump controller installation involves plumbing connections.
- Level:
- To ensure the controller is installed straight and level
- Cable Ties or Wire Clips:
- For organizing and securing cables
- Hole Saw (if needed):
- If you need to create openings for cables or pipes
- Caulk Gun and Sealant (if needed):
- To seal any openings or gaps in the installation
Materials
- Automatic Water Pump Controller:
- Purchase a controller suitable for your pump system
- Electrical Wire:
- Gauge and type suitable for the electrical requirements of the pump and controller
- Conduit and Fittings:
- If required for protecting and organizing electrical wires
- Electrical Boxes:
- For mounting and protecting electrical connections
- Mounting Hardware:
- Screws and anchors for securing the controller and electrical boxes.
- Pipe and Fittings (if applicable):
- If your installation involves plumbing connections
- Wire Connectors:
- Suitable connectors for joining wires
- Sealant or Gaskets (if needed):
- To create a watertight seal if installing outdoors or in damp conditions
- Cable Glands (if needed):
- For sealing cable entries and exits
- Dust Cover or Enclosure (if needed):
- If your installation environment requires protection against dust or moisture
- Documentation and Manuals:
- Read and keep the installation manuals and documentation provided by the manufacturer
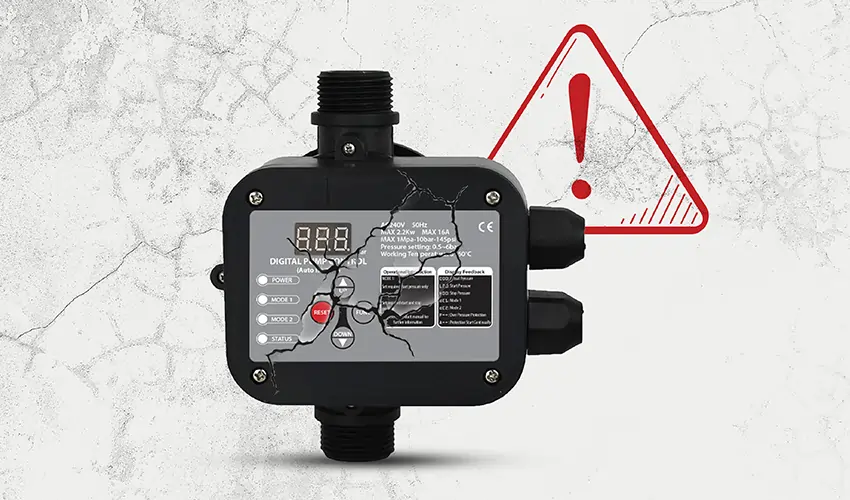
How to Install Automatic Water Pump Controller
Installing an automatic water pump controller involves connecting the controller to the water pump and electrical supply. Below is a general guide for the installation process. Keep in mind that specific instructions may vary based on the brand and model of the water pump controller you have. Always refer to the manufacturer’s manual for precise guidance.
Step-by-Step Installation Guide
- Safety First
- Ensure that the power supply to the water pump is turned off before starting the installation.
- Gather Tools and Materials
- Collect all the necessary tools and materials listed in the previous response.
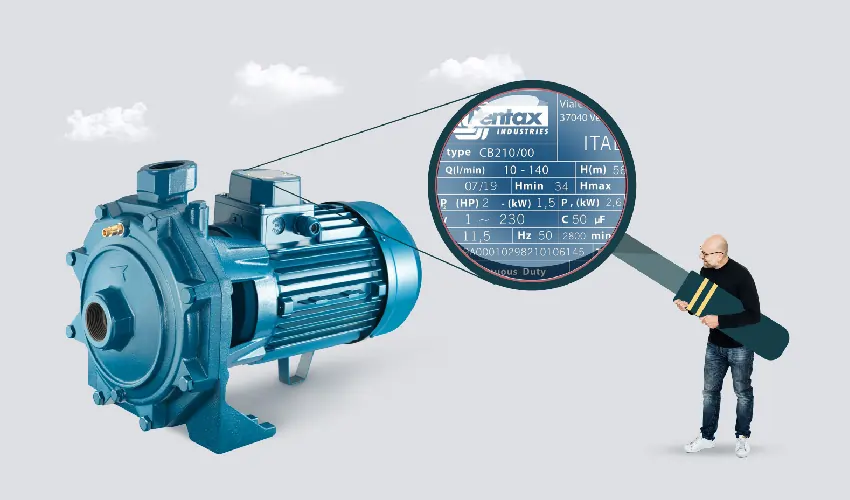
- Read the Manual:
- Carefully read the manual provided by the manufacturer. It will contain important information specific to your water pump controller.
- Locate a Suitable Installation Site:
- Choose a location for installing the controller that is dry, well-ventilated, and easily accessible.
- Mount the Controller
- Mount the controller securely using the provided mounting hardware. Use a level to ensure that it is installed straight and level.
- Connect Power Supply
- Connect the power supply wires to the appropriate terminals on the controller. Follow the manufacturer’s color-coding or labeling for proper connections. Use wire connectors to secure the connections.
- Connect Pump Wires
- Connect the wires from the water pump to the corresponding terminals on the controller. Again, follow the manufacturer’s instructions for correct wiring.
- Grounding
- Ensure that the controller is properly grounded according to the manufacturer’s specifications.
- Connect Sensors (if applicable)
- If your water pump controller uses sensors (such as level sensors), connect them according to the provided instructions.
- Secure and Organize Wires
- Use cable ties or wire clips to secure and organize the wires, preventing tangling or interference.
- Install Conduit (if needed)
- If required, install conduit to protect and organize the electrical wires. Secure the conduit with appropriate fittings.
- Seal Openings (if needed)
- If the installation site is exposed to the elements, use sealant or gaskets to seal any openings or gaps in the controller enclosure.
- Test the System
- Turn on the power supply and test the system to ensure the pump starts and stops as intended. Check for any unusual sounds or behaviors.
- Adjust Settings (if applicable)
- If your controller has adjustable settings (such as pressure settings), adjust them according to your specific requirements.
- Monitor for a Period
- Keep an eye on the system for a period to ensure it operates correctly and there are no issues.
- Secure the Controller Cover
- Once you are satisfied with the installation, secure the controller cover to protect the internal components.
Conclusion
In conclusion, automatic water pump controller setup involves careful planning, adherence to safety guidelines, and precise connection of electrical and pump components. Following the manufacturer’s instructions, securing proper grounding, and conducting thorough testing are essential steps to ensure a successful and safe installation. If uncertainties arise, seeking professional assistance is recommended to guarantee compliance with electrical codes and standards.