Jet Pump Repair
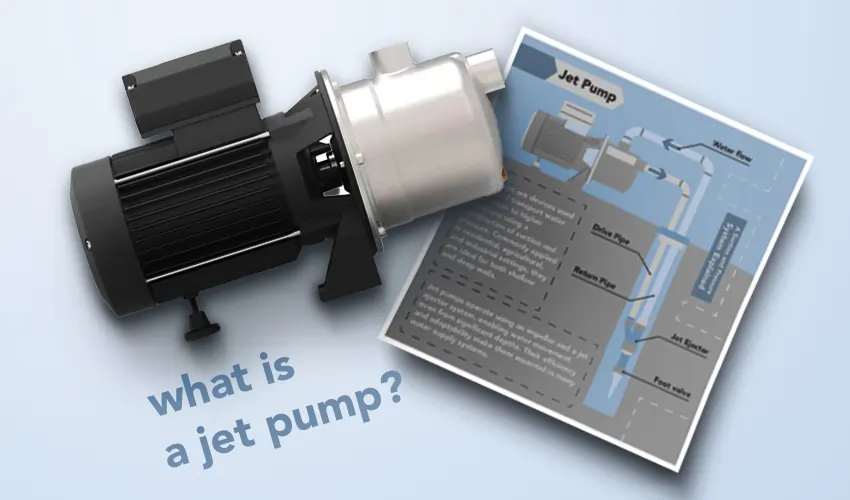
This article delves into the world of jet pump repair, providing a foundational understanding of what it entails. Jet pumps are commonly used in various applications, including water wells and garden sprinklers. They operate by drawing water through a jet, or narrow opening, creating a vacuum that moves the water.
When it comes to repairing jet pumps, the process generally involves diagnosing issues like loss of pressure, noise, or complete failure to operate. However, the specifics of the repair can vary significantly depending on the model and the nature of the problem. Repairing a jet pump typically includes steps like inspecting the pump and its components, identifying any worn or damaged parts, and replacing or repairing these components to restore the pump to optimal function. Despite the generalities of this overview, each repair scenario is unique and should be approached with careful consideration of the pump’s specifications and the nature of its malfunction.
How to Repair Pump?
Jet Pump Overhaul requires a systematic approach to diagnosing and fixing issues. Before starting any repair, ensure the power supply to the pump is turned off. Work in a well-lit area and wear appropriate safety gear like gloves and eye protection. Initial Diagnosis In the process of diagnosing and jet pump restoration, two key initial steps are symptom observation and visual inspection.
1. Symptom Observation: This involves carefully observing the pump during operation to identify any unusual signs like noises, vibrations, or a drop in water pressure.
- Noises: Different sounds can indicate specific issues. Squealing or screeching often points to problems with bearings in the motor or impeller, whereas grinding or gurgling can signify an obstructed or damaged impeller.
- Vibrations: Excessive vibration may suggest issues such as an imbalanced impeller, misaligned components, or motor problems.
- Water Pressure: A noticeable decrease in water pressure can be caused by a variety of factors, including clogged jet or venturi tubes, air leaks, wear in the impeller, or issues with the pressure switch or tank.
2. Visual Inspection: This step involves a detailed examination of the pump for visible signs of damage or wear.
- Pump Casing: Check for cracks, damage, or corrosion, which can lead to water leakage and structural weakness.
- Hose Connections: Inspect for leaks or wear, as compromised connections can introduce air into the system, affecting water pressure.
- Jet Assembly: Examine the jet nozzle and venturi tube for blockages or damage, as these issues can significantly reduce the pump’s efficiency.
Disassembly
In the process of jet pump repair, following symptom observation and visual inspection, the next critical step is disassembly, which involves accessing and carefully taking apart the pump.
1. Access the pump: This stage requires you to remove the pump from its operational setup, depending on how it is installed. This might involve detaching the pump from its mounting, disconnecting it from the water supply, and ensuring it is safely and securely positioned for disassembly.
2. Disassemble: This step is about methodically dismantling the pump to reach and inspect its internal components. It typically includes:
Inspection
In the sequence of jet pump repair, after disassembly, the crucial next step is the detailed Inspection of the pump’s internal components.
1. Check the Impeller: This involves scrutinizing the impeller for any signs of physical wear or damage. Identifying cracks, chips, or significant wear on the impeller is crucial as it plays a vital role in the pump’s functionality.
2. Examine the Jet Assembly: The focus then shifts to the jet assembly, which includes inspecting the jet nozzle and venturi tube. It’s essential to ensure these components are clear of any obstructions, such as debris, as blockages can severely impact the water flow. Additionally, checking for any physical damage is important.
3. Seals and Gaskets: A thorough inspection of seals and gaskets is also imperative. These components must be checked for any signs of wear, brittleness, or breakage. Damaged seals and gaskets are often a common cause of leaks and can compromise the pump’s pressure and efficiency.
Cleaning
Following the inspection of the jet pump’s internal components, the next integral step in the repair process is cleaning, which is crucial for ensuring the pump operates efficiently.
1. Remove Debris: This involves a meticulous cleaning of the pump components to remove any sediment, debris, or buildup. Over time, these materials can accumulate inside the pump, potentially leading to blockages or impairing the pump’s functionality. Particular attention should be paid to the impeller and the jet assembly, as these are areas where debris commonly accumulates.
2. Clean Filters and Screens: If the pump is equipped with filters or screens, these should be carefully inspected and cleaned. Over time, filters and screens can become clogged with debris, which can significantly reduce the pump’s efficiency and water flow. In cases where the filters or screens are too worn or damaged to be effectively cleaned, they should be replaced to ensure the pump operates at its best.
Repair or Replace Parts
After cleaning the jet pump’s components, the next essential step in the repair process is to repair or replace parts, which is critical for restoring the pump’s functionality and efficiency.
1. Replace Worn Parts: This step involves identifying and replacing any damaged or worn-out components discovered during the inspection. Key parts like the impeller, seals, and gaskets often need attention. A damaged impeller must be replaced to ensure efficient water flow and pressure. Similarly, worn or brittle seals and gaskets are common culprits for leaks and pressure loss; replacing them is essential to maintaining the integrity of the pump.
2. Lubrication: Proper lubrication of the pump’s moving parts is another important aspect of this step. Applying lubricant as per the manufacturer’s guidelines helps reduce friction, prevent wear, and prolong the life of the components. Special attention should be given to bearings and any other moving parts within the pump assembly.
Reassembly
Following the repair or replacement of parts and their proper lubrication, the subsequent vital step in the jet pump repair services is Reassembly.
1. Careful Assembly: This involves meticulously reassembling the pump, making sure that all parts are correctly aligned and secured. Each component, including the newly replaced parts like the impeller, seals, and gaskets, needs to be placed back in its exact position as per the pump’s design.
2. Check Connections: Once the pump is reassembled, it’s important to carefully check all hose and fitting connections. Ensuring that these connections are tightly secured is essential to preventing leaks, which could compromise the pump’s efficiency and functionality.
Testing
After the meticulous process of reassembly, the next crucial stage in jet pump repair is Testing.
1. Power On: The first step in testing is to restore power to the pump. This should be done carefully, ensuring all safety protocols are followed. Restoring power is not just about switching the pump on; it also involves monitoring the initial response of the pump to power restoration, such as any immediate noises or movements that might indicate an issue.
2. Test Run: Once the power is on, the pump should be run through a test cycle. During this test run, keen observation is crucial. Look out for any leaks or unusual noises that weren’t present before the repair. Leaks might suggest that some connections are not properly sealed, or there could be an issue with the new seals or gaskets.
Shallow Well Jet Pump Repair
Repairing a shallow well jet pump is a detailed and safety-conscious process that involves several key stages. Initially, the power must be turned off for safety. The repair starts with observing the pump for any unusual noises or a drop in water pressure, indicating common problems like clogged nozzles, faulty impellers, or leaky pipes. Following this, a visual inspection of the pump and its connections is conducted to identify any visible damage or leaks.
The pump is then carefully disassembled for a closer inspection of internal components like the impeller and jet assembly, cleaning out any debris and replacing any worn or damaged parts as needed. Lubrication of moving parts is also a crucial step in this process. Once the parts are replaced and everything is cleaned, the pump is reassembled, ensuring all parts are correctly aligned and secured and connections are leak-free.
Conclusion
In conclusion, the repair of jet pumps, whether shallow or deep, underscores the importance of early problem identification and timely repairs. The efficiency and longevity of a jet pump are heavily dependent on how promptly and effectively issues are addressed. Recognizing the initial signs of malfunction, such as unusual noises, vibration, or a drop in water pressure, is crucial in preventing minor issues from escalating into major faults. Regular maintenance and careful monitoring play key roles in identifying these early warning signs, allowing for swift intervention. Effective Jet pump reconditioning not only restores the pump’s functionality but also helps avert more complex and costly repairs down the line.