In this blog post, we’ll walk you through everything you need to know about how to install portable air conditioner, from safety tips during installation, necessary measures to start them, to tips on increasing their efficiency.
Steps to Install a Portable Air Conditioner
Setting up and installing a portable air conditioner is a relatively straightforward process. Here are the general steps you can follow:
1. Unpack the Unit
Remove Packaging: Carefully unpack the portable air conditioner and remove any protective materials.
Check Components: Ensure all parts are included (e.g., exhaust hose, window kit, remote control).
2. Choose the Location
Accessibility: Place the unit near a window and a power outlet.
Ventilation: Ensure there’s enough space around the unit for proper air circulation.
Surface: Place it on a flat, stable surface.
3. Install the Window Kit
Measure the Window: Measure the window opening to fit the window kit.
Adjust the Kit: Adjust the window kit panels to match your window size.
Secure the Kit: Place the window kit in the window and secure it in place. Ensure there are no gaps.
4. Attach the Exhaust Hose
Connect to the Unit: Attach one end of the exhaust hose to the air conditioner. This usually involves twisting or snapping it into place.
Connect to the Window Kit: Attach the other end of the hose to the window kit. Ensure it fits snugly to prevent air leaks.
5. Plug in the Unit
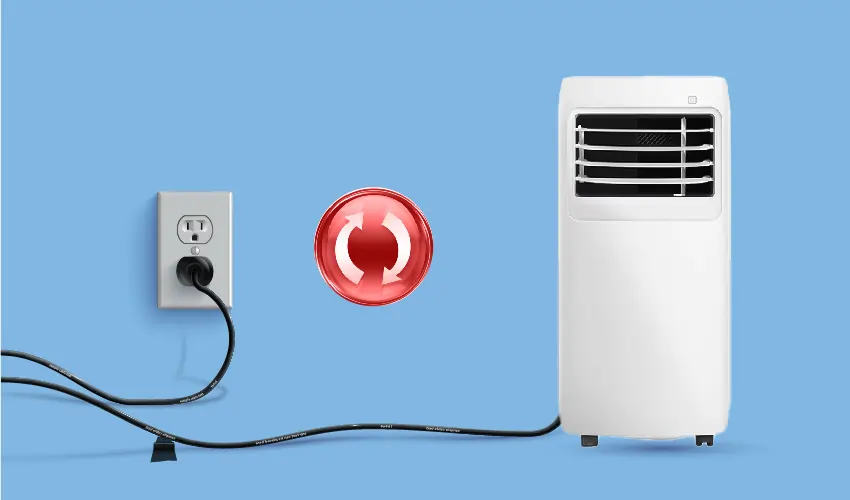
Power Source: Plug the air conditioner into a grounded power outlet.
Avoid Extension Cords: If possible, plug directly into the wall socket to avoid potential overheating.
6. Set Up the Water Drain
Internal Tank: Most portable AC units have an internal water tank. Check your model for specific draining instructions.
Continuous Drain Option: If your unit has a continuous drain option, connect a drain hose to the designated port for continuous drainage.
7. Turn On and Test
Power On: Turn on the air conditioner.
Set Temperature: Adjust the temperature settings to your preference.
Check Airflow: Ensure cool air is flowing from the unit and that exhaust air is properly venting outside.
Installing the Portable Air Conditioner Through Wall
Installing a portable air conditioner through a wall requires some additional steps compared to a window installation. Here’s a detailed guide:
1. Choose the Location
Accessibility: Select a suitable wall near a power outlet.
Ventilation: Ensure the chosen location allows for proper air circulation around the unit.
Exterior Consideration: Ensure the exterior side of the wall is suitable for venting.
2. Gather Necessary Tools and Materials
Tools: Drill, jigsaw, measuring tape, level, screwdriver, caulking gun.
Materials: Wall vent kit compatible with your portable AC, screws, caulk or weather stripping, support brackets (if needed).
3. Measure and Mark
Measure the Exhaust Hose: Measure the diameter of the exhaust hose to determine the size of the hole you’ll need to cut.
Mark the Wall: Mark the location on the wall where the exhaust hose will go through. Use a level to ensure the marks are straight.
4. Cut the Hole
Drill Pilot Holes: Drill pilot holes at the corners of the marked area inside the wall.
Cut the Opening: Use a jigsaw to cut out the marked section of the wall. Ensure the hole is slightly larger than the diameter of the exhaust hose.
Exterior Wall: If your wall has an exterior layer (like brick or siding), you may need additional tools to cut through it.
5. Install the Wall Vent Kit
Fit the Kit: Insert the wall vent kit into the hole. Ensure it fits snugly and aligns properly.
Secure the Vent: Use screws to secure the vent kit in place. Ensure it’s firmly attached to both the interior and exterior walls.
Seal the Edges: Apply caulk or weather stripping around the edges of the vent kit to prevent air leaks.
6. Attach the Exhaust Hose
Connect to the Unit: Attach one end of the exhaust hose to the portable air conditioner.
Connect to the Wall Vent: Attach the other end of the exhaust hose to the wall vent. Ensure it’s securely connected to prevent any leaks.
7. Mount the Portable Air Conditioner (if needed)
Support Brackets: If your portable air conditioner is heavy, you might need to install support brackets to hold the unit in place.
Secure the Unit: Ensure the unit is stable and properly supported.
8. Plug in the Unit
Power Source: Plug the air conditioner into a grounded power outlet.
Avoid Extension Cords: If possible, use a direct plug to avoid potential overheating.
9. Turn On and Test
Power On: Turn on the air conditioner.
Check for Leaks: Ensure there are no air leaks around the wall vent kit.
Set Temperature: Adjust the temperature settings to your preference.
Check Airflow: Ensure cool air is flowing from the unit and that exhaust air is properly venting outside.
Is Installing the Portable Air Conditioner Without Hose Recommended?
Using a portable air conditioner without an exhaust hose is generally not recommended because these units are designed to expel hot air outside to cool the room effectively. However, if you are in a situation where using a hose is not feasible, here are some alternative cooling methods you can consider:
1. Evaporative Coolers (Swamp Coolers)
How They Work: These units cool air by evaporating water, which can be very effective in dry climates.
No Exhaust Hose Needed: They don’t require an exhaust hose as they don’t generate hot air that needs to be vented outside.
Humidity Factor: They add moisture to the air, which is beneficial in dry climates but not suitable for humid environments.
2. Dual-Hose Portable AC Units
How They Work: Dual-hose units use one hose to intake air from outside and another to expel hot air, which can be more efficient.
Reduced Need for Ventilation: While they still need hoses, they are more efficient and less intrusive than single-hose units.
3. Ventless Cooling Options
Fans: High-velocity fans can help circulate air and create a cooling breeze.
Ice-Based Coolers: Some units use ice or cold water to cool the air. They don’t require an exhaust hose but are less effective than traditional air conditioners.
Portable Coolers with Ice Packs: These use ice packs to cool the air and can be a temporary solution.
4. Improve Room Insulation
Seal Gaps: Ensure doors and windows are well-sealed to prevent hot air from entering the room.
Curtains/Blinds: Use blackout curtains or blinds to block sunlight and reduce heat gain.
5. Alternative Air Conditioning Solutions
Window Air Conditioners: If possible, install a window air conditioner, which is more efficient and doesn’t take up floor space.
Mini-Split Systems: These require professional installation but provide efficient cooling without needing a window or exhaust hose.
6. Using a Portable AC Without a Hose
If you still want to use a portable air conditioner without the hose, here’s what you can do, understanding that it will be far less effective:
Place Near a Window: Position the unit as close to a window as possible to allow some hot air to escape.
Dehumidify Mode: Use the unit’s dehumidifier mode if it has one. This won’t cool the air significantly but will reduce humidity.
Create a Vent: If feasible, create a small vent in the room to allow some hot air to escape, though this won’t be as effective as a dedicated exhaust hose.
Safety Tips Before Installing a Portable Air Conditioner
Here are some safety tips to keep in mind before portable air conditioner installation:
Read the manual: Always refer to the manufacturer’s installation and usage instructions first.
Weight considerations: Portable Air Conditioners are heavy. Do not attempt to lift one by yourself as it could cause serious injury.
Power supply: Never connect a portable AC to a power extension or a power strip. Portable ACs draw a lot of power when the compressor kicks on. Connect it to a grounded electrical outlet only.
Child safety: Keep children away from the unit. Kids should not play around it, hang or sit on it. It could tip and get damaged or cause serious injury.
Installation before power: Only plug it in after you have completed the installation. Especially your exhaust and drain hoses – make sure they are air- and water-tight and that all sealants have cured.
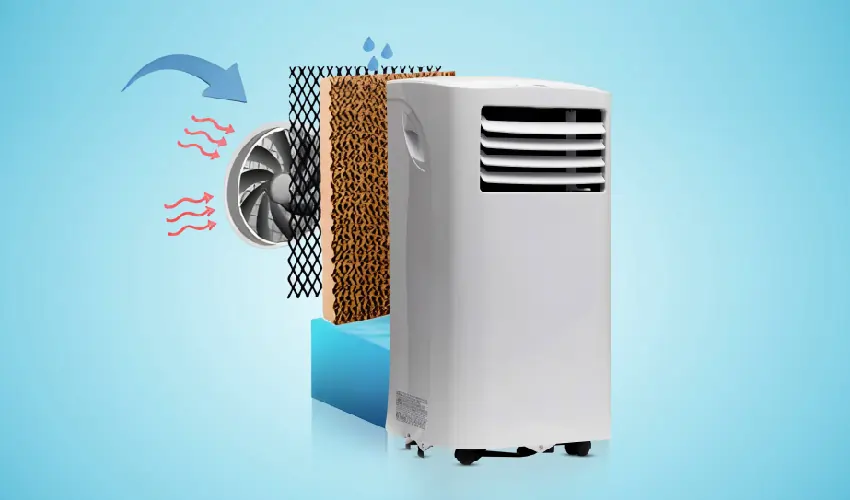
Air filter: Make sure the included air filter is installed before using a portable AC. Flying debris can damage the unit.
Professional repair: Do not attempt to repair a portable AC yourself. Take it to an HVAC technician or ask the manufacturer for guidance.
Placement: A portable AC should always be placed on a hard level floor at least 8-12″ away from obstructions like furniture and flowers
Necessary measures to start a portable air conditioner
Here are the necessary measures to start a portable air conditioner:
Unpack the unit: Let it settle for one to two hours.
Check the installation kit: Contact the company if anything is missing.
Connect the exhaust hose and its connectors.
Install the window kit: Lift the window and place the window kit in the middle, sealing it with foam.
Attach the window slider: Attach the window slider to the window kit and adjust the length.
Connect the exhaust hose: Connect the exhaust hose to the portable AC unit and the window kit.
Plug in the power cord: Press the reset button if needed.
Turn on the power button: Set the desired temperature
Tips for ventilation of portable air conditioners during installation
Portable air conditioners, while convenient, require proper ventilation to operate efficiently and safely. Here are some tips for ensuring adequate ventilation during installation:
1. Exhaust Hose Placement
Placement: The exhaust hose should be directed outside the room, ideally through a window or door.
Length: Keep the hose as short as possible to minimize resistance and ensure efficient airflow.
Avoid Obstructions: Make sure the hose is not kinked or blocked by furniture or other objects.
Window Kit: Use a window kit designed for portable ACs to seal the gap around the hose and prevent hot air from re-entering the room.
2. Room Size and Air Conditioner Capacity
Matching Capacity: Choose an air conditioner with a cooling capacity that matches the size of the room. A unit that’s too small will struggle to cool the space, while one that’s too large can lead to excessive humidity.
Room Size: Ensure the room is well-ventilated and has adequate airflow.
Open Windows: Consider opening a window in a different room to provide fresh air circulation.
3. Air Conditioner Placement
Distance from Walls: Place the air conditioner at least 12 inches away from walls to allow for proper airflow.
Avoid Obstructions: Ensure the air conditioner is not blocked by furniture or other objects.
4. Additional Tips
Regular Cleaning: Clean the air conditioner’s filter regularly to maintain optimal performance.
Proper Maintenance: Follow the manufacturer’s instructions for maintenance and cleaning.
Safety First: Never leave the air conditioner running unattended for extended periods.
5. Window Kit Installation
Securely Fit: Ensure the window kit is securely fitted to prevent leaks and drafts.
Proper Seal: Use weather stripping or tape to seal any gaps between the kit and the window.
Increasing the Efficiency of Portable Air Conditioner
- Minimize Exhaust Hose Distance: Just because your unit comes with hoses that can be stretched out up-to-X feet, doesn’t mean you should use all X feet.
- Use the Correct Window Adapter.
- Minimize Heat Sources: Turn off unnecessary heat sources.
- Leave the Unit Running: It’s more efficient to leave the air conditioner running than to turn it on and off repeatedly.
- Keep Your Filters Clean and Watch for Water Buildup: Regularly clean the filters.
- Consider Jerry rigging a Second Hose.
- Keep the exhaust hose as straight as it can be.
- Close doors and windows.
- Turn on the air conditioner before you need it.
- Make sure the portable air con unit is performing optimally.
Conclusion
Portable air conditioners are a convenient and flexible cooling solution. However, their installation and operation require careful attention to safety and efficiency measures. From the initial setup to regular maintenance, following the manufacturer’s instructions and taking additional steps can enhance the unit’s performance.